DaemonSetは、Kubernetesクラスタ内のすべてのノードがポッドのコピーを実行することを確認します。すべてのノードにポッドのコピーがあります。ノードがクラスターに追加されると、ポッドがノードに追加され、ノードがクラスターから削除されると、ポッドが削除されます。 DaemonSetを削除すると、作成したポッドがクリーンアップされます。
DaemonSetは、すべてのノードがポッドのコピーを実行することを保証します。通常、ポッドが実行されるノードはスケジューラーによって選択されますが、DaemonSetポッドはDaemonSetコントローラーによって作成およびスケジュールされます。
Daemonsetを使用できます。
- 各ノードでクラスターストレージを実行するには:glusterd、cephなど
- 各ノードでログ収集を実行するには:fluentd、logstashなど
- Prometheus Node Exporter、collectd、Datadogエージェントなどのノードモニタリングを実行します。
Daemonsetの詳細については、Kubernetesの公式ドキュメントであるkubernetes.ioにアクセスしてください 。
この記事では、「fluentd_elasticsearch」のデーモンセットを作成します。これにより、クラスター内の各ノードに「fluentd_elasticsearch」のポッドが作成されます。 Daemonset定義ファイルには、マスターノードのTaint for Taintが含まれ、ポッドがマスターノードでもスケジュールされるようにします。
前提条件
- 少なくとも1つのワーカーノードを持つKubernetesクラスタ。
Kubernetesクラスタの作成方法を学びたい場合は、ここをクリックしてください 。このガイドは、AWS Ubuntu 18.04 EC2インスタンスで1つのマスターと2つのノードを持つKubernetesクラスターを作成するのに役立ちます。
何をしたらいいでしょう?
- デーモンセットを作成する
デーモンセットを作成する
デフォルトのネームスペースとすべてのネームスペースにデーモンセットが存在するかどうかを確認します。
kubectl get daemonsets #Get daemonsets from the default namespace
kubectl get daemonsets --all-namespaces #Get daemonsets from all namespace using --all-namespace option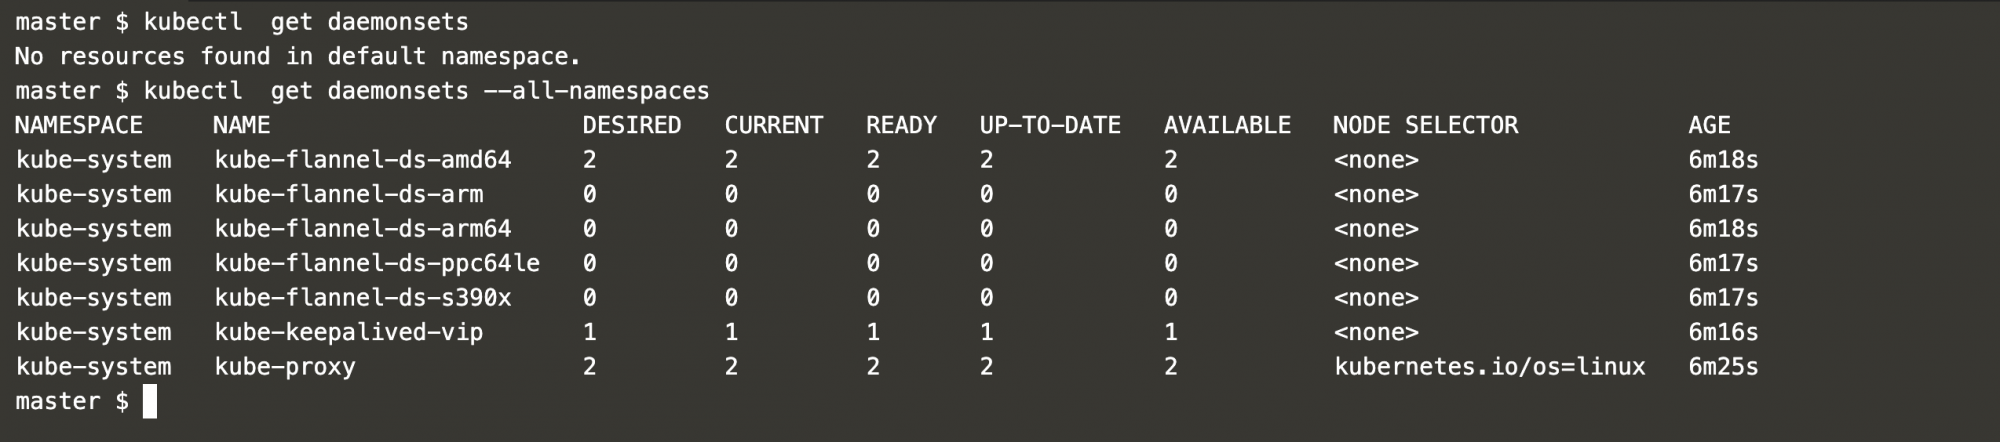
上のスクリーンショットでは、いくつかのDaemonsetが利用できることがわかります。これらのデーモンセットはすべて、クラスタコンポーネント用です。
次に、「kube-system」名前空間に属するポッドを取得します。
kubectl get pods -n kube-system #Get pods from the "kube-system" namespace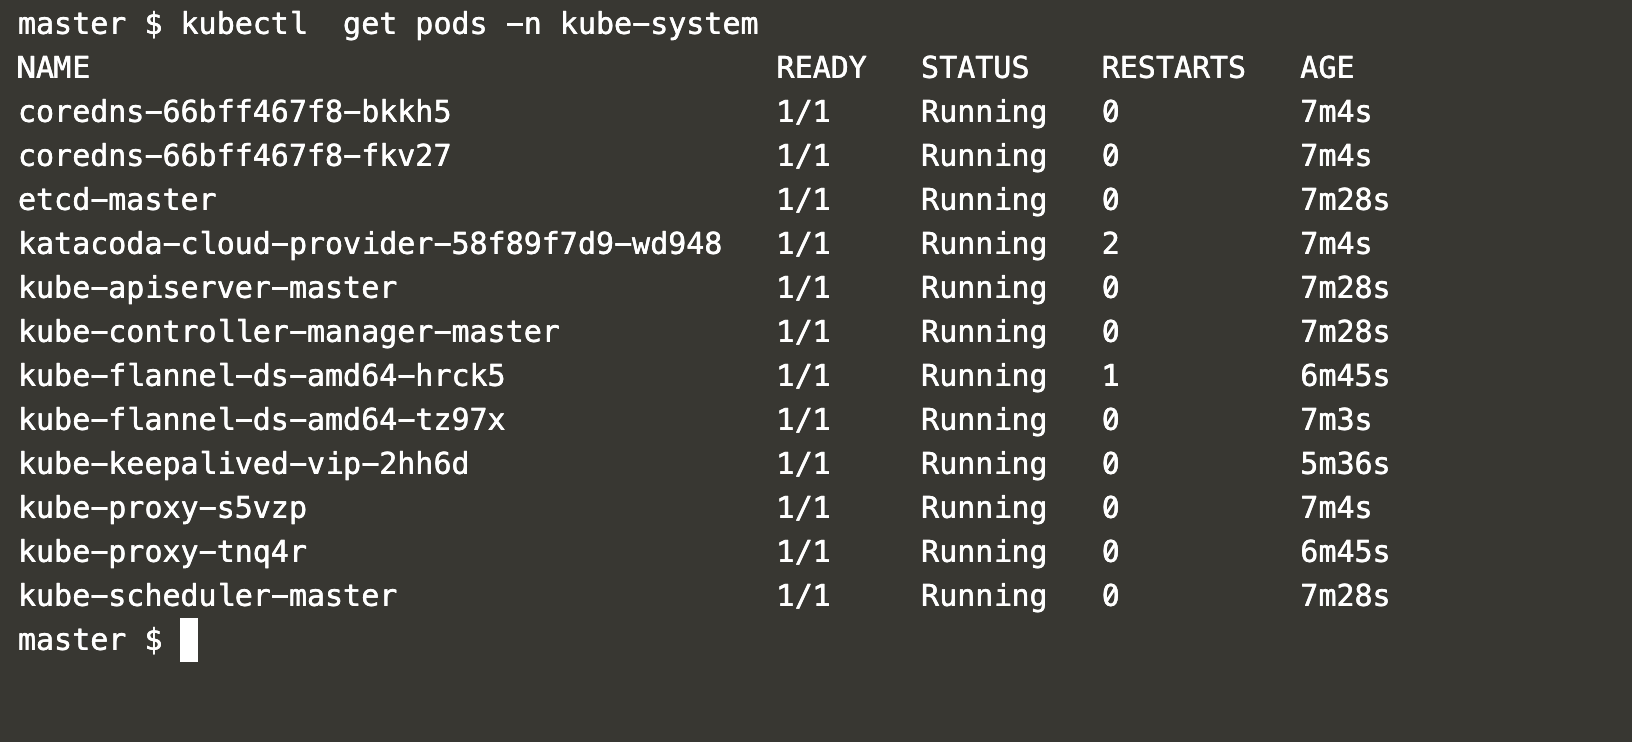
上記のスクリーンショットに表示されているこれらのポッドはすべて、クラスターコンポーネントのデーモンセットに属しています。
プロキシポッドのリストを取得します。
kubectl get pods -n kube-system | grep proxy #Get pods from the "kube-system" namespace and grep for proxyプロキシポッドを制御するものを確認します。
kubectl describe pod kube-proxy-s5vzp -n kube-system #Describe the pod from the "kube-system" namespaceプロキシポッドを制御するデーモンセットの詳細を取得します。
kubectl describe daemonset kube-proxy -n kube-system #Describe the daemonset from the "kube-system" namespace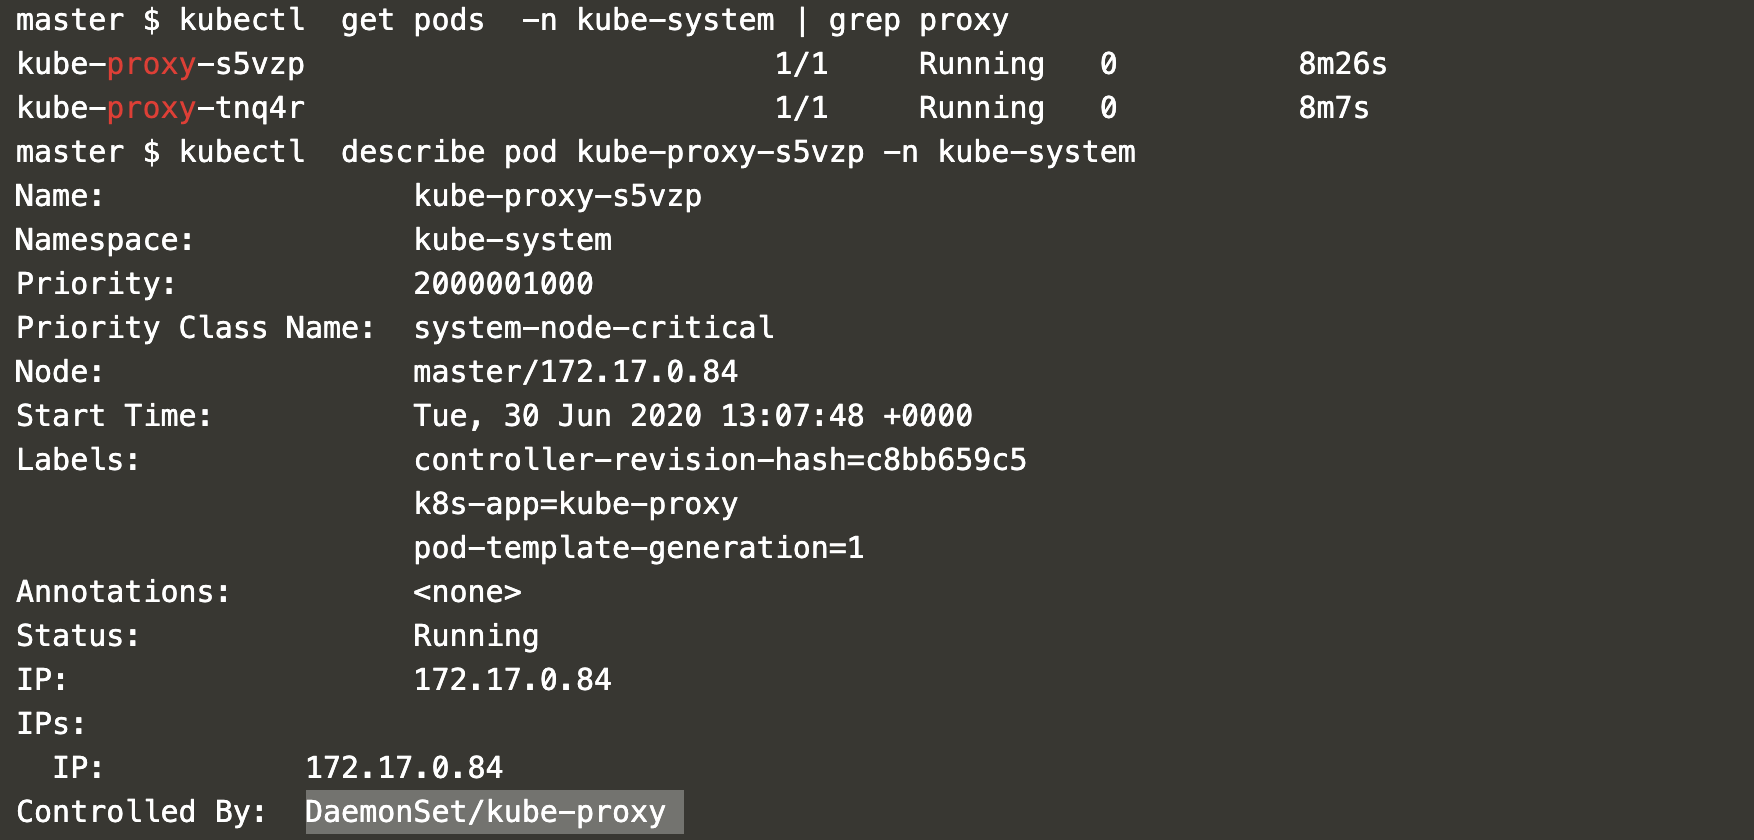
以下のデーモンセット定義を含むファイルを作成します。
vim my-daemonset.ymlapiVersion: apps/v1
kind: DaemonSet
metadata:
name: my-fluentd-elasticsearch-daemonset
namespace: kube-system
labels:
k8s-app: fluentd-logging
spec:
selector:
matchLabels:
name: fluentd-elasticsearch
template:
metadata:
labels:
name: fluentd-elasticsearch
spec:
tolerations:
- key: node-role.kubernetes.io/master
effect: NoSchedule
containers:
- name: fluentd-elasticsearch
image: quay.io/fluentd_elasticsearch/fluentd:v2.5.2
resources:
limits:
memory: 200Mi
requests:
cpu: 100m
memory: 200Mi
volumeMounts:
- name: varlog
mountPath: /var/log
- name: varlibdockercontainers
mountPath: /var/lib/docker/containers
readOnly: true
terminationGracePeriodSeconds: 30
volumes:
- name: varlog
hostPath:
path: /var/log
- name: varlibdockercontainers
hostPath:
path: /var/lib/docker/containers
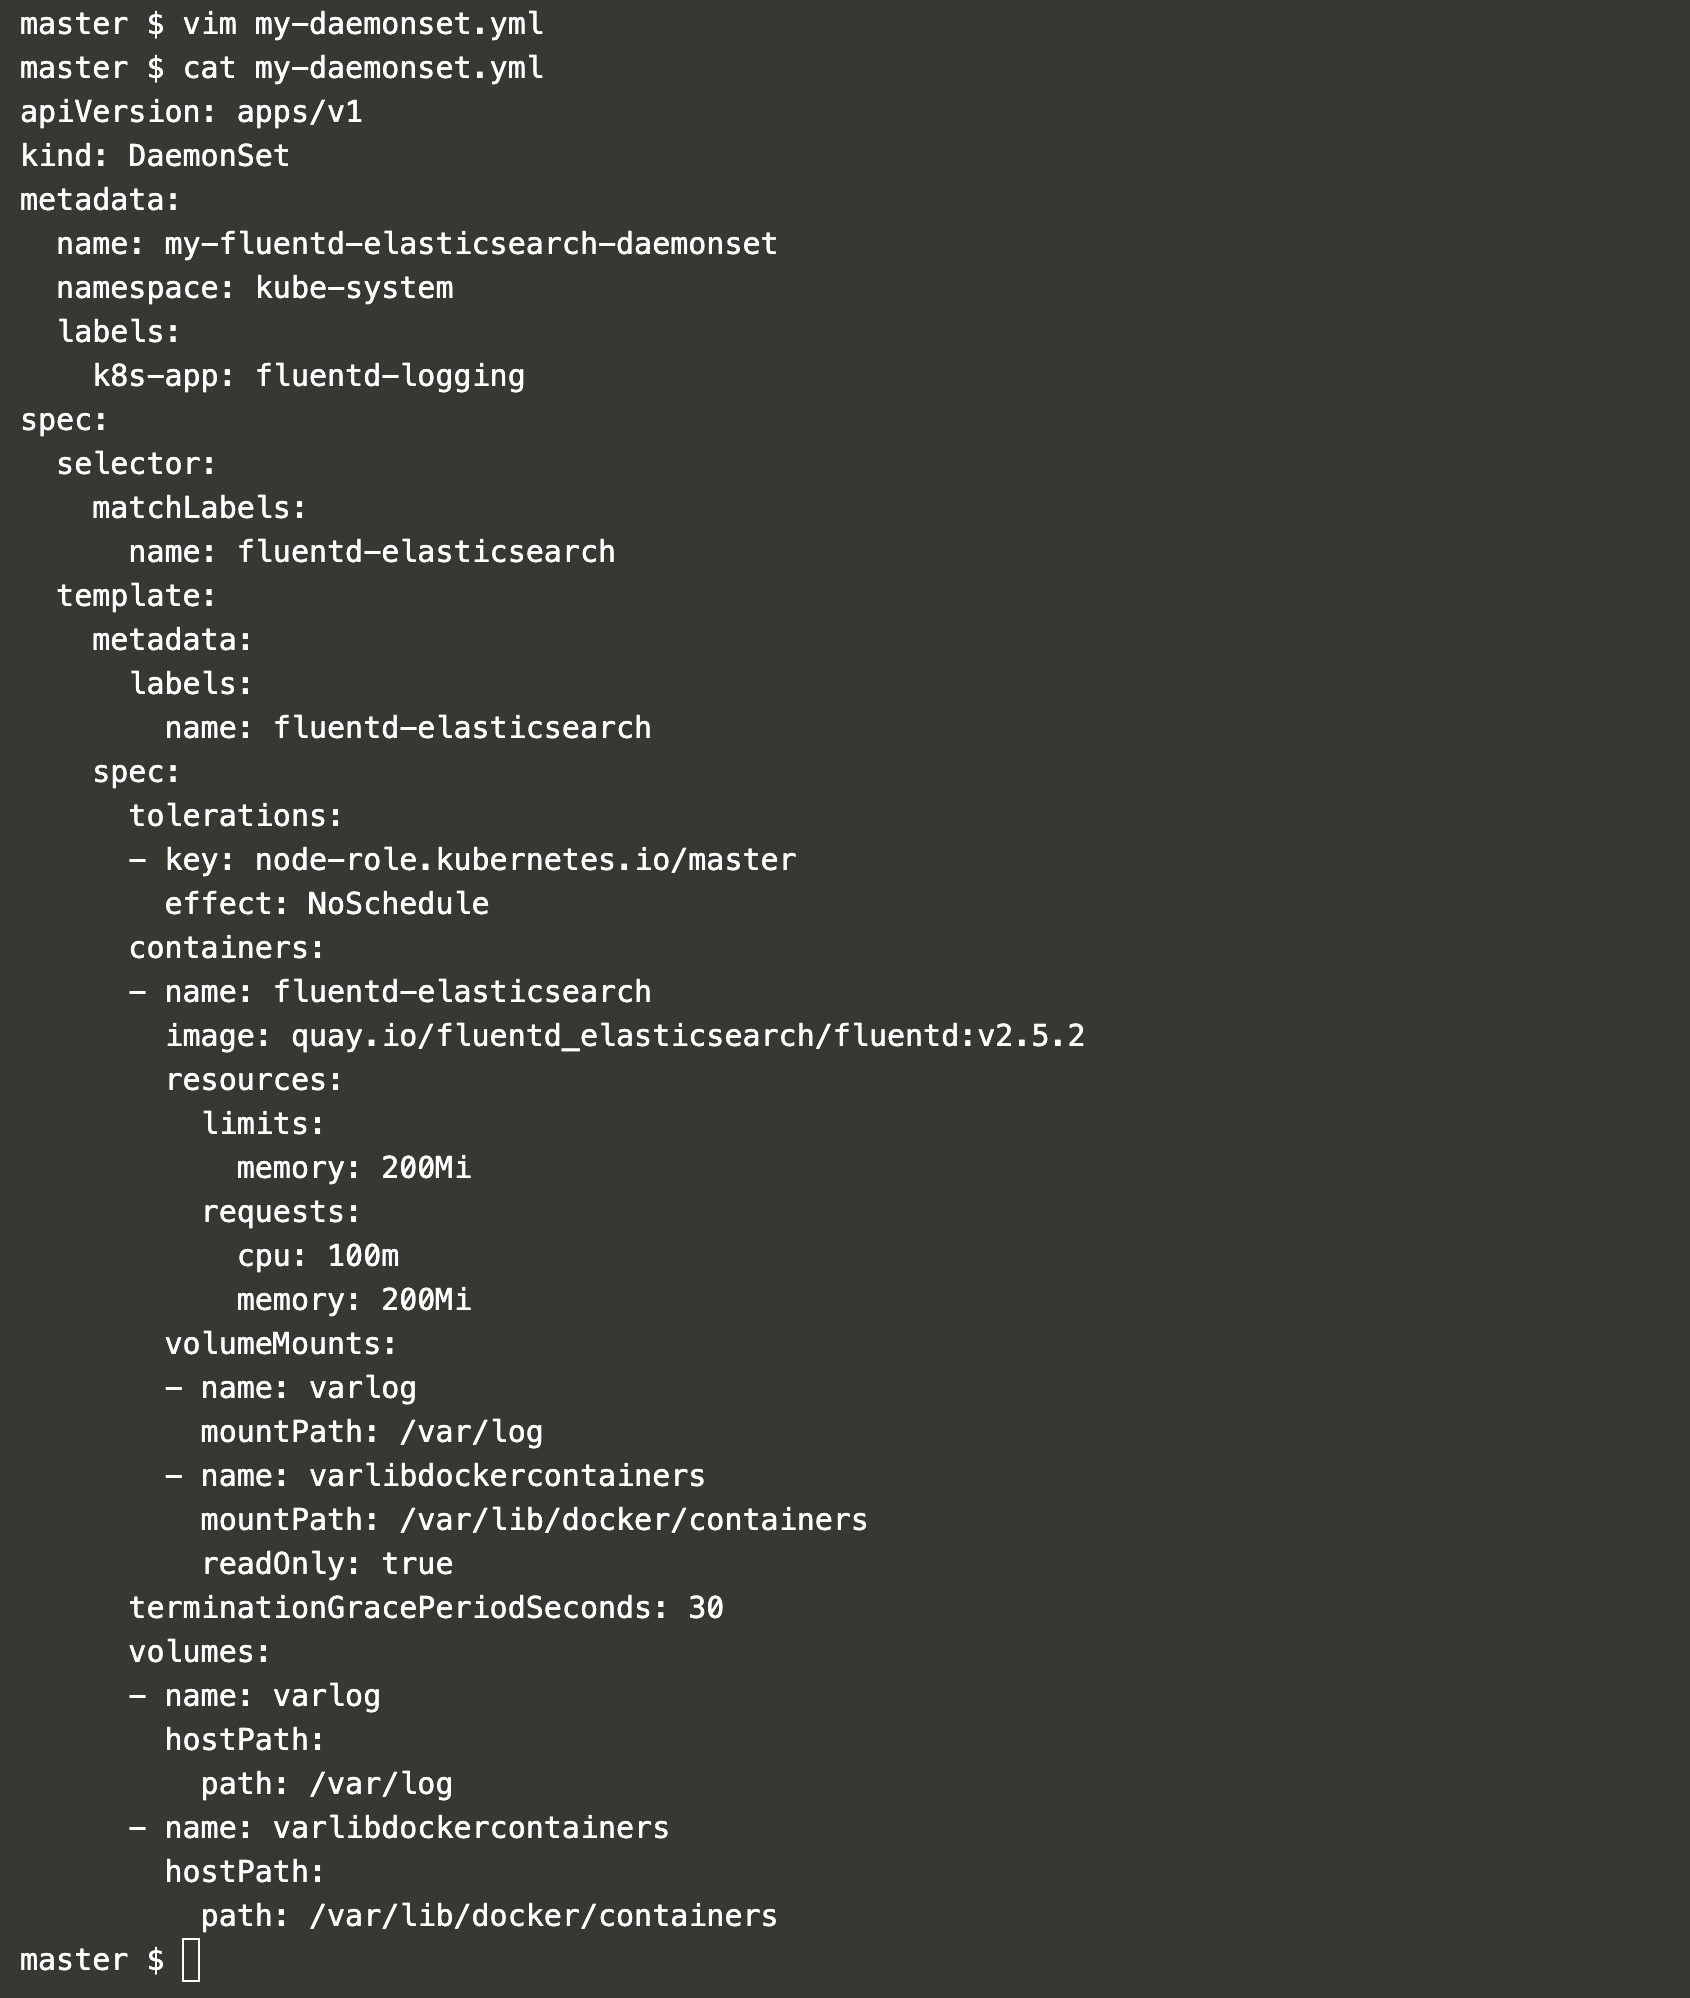
上記の定義では、マスターノードの汚染に対する耐性があります。これにより、ポッドがマスターノードにも配置されます。
上記の手順で作成した定義ファイルを使用してデーモンセットを作成します。
kubectl create -f my-daemonset.yml #Create a daemonsetkubectl get daemonset -n kube-system #Get daemonset from the "kube-system" namespace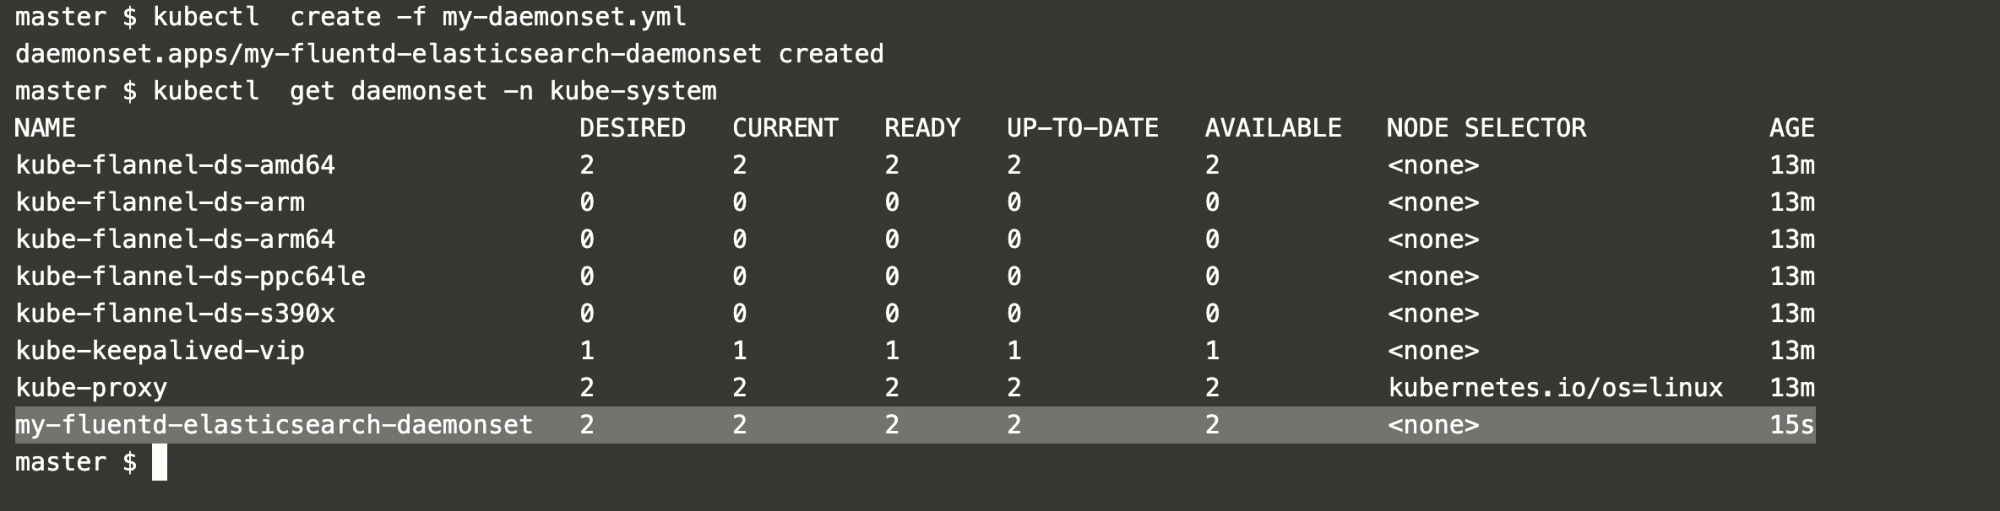
このデーモンセットは、「kube-system」名前空間に作成されています。
「kube-system」名前空間に作成したデーモンセットについて説明してください。
kubectl describe daemonset my-fluentd-elasticsearch-daemonset -n kube-system #Describe the daemonset from the "kube-system" namespace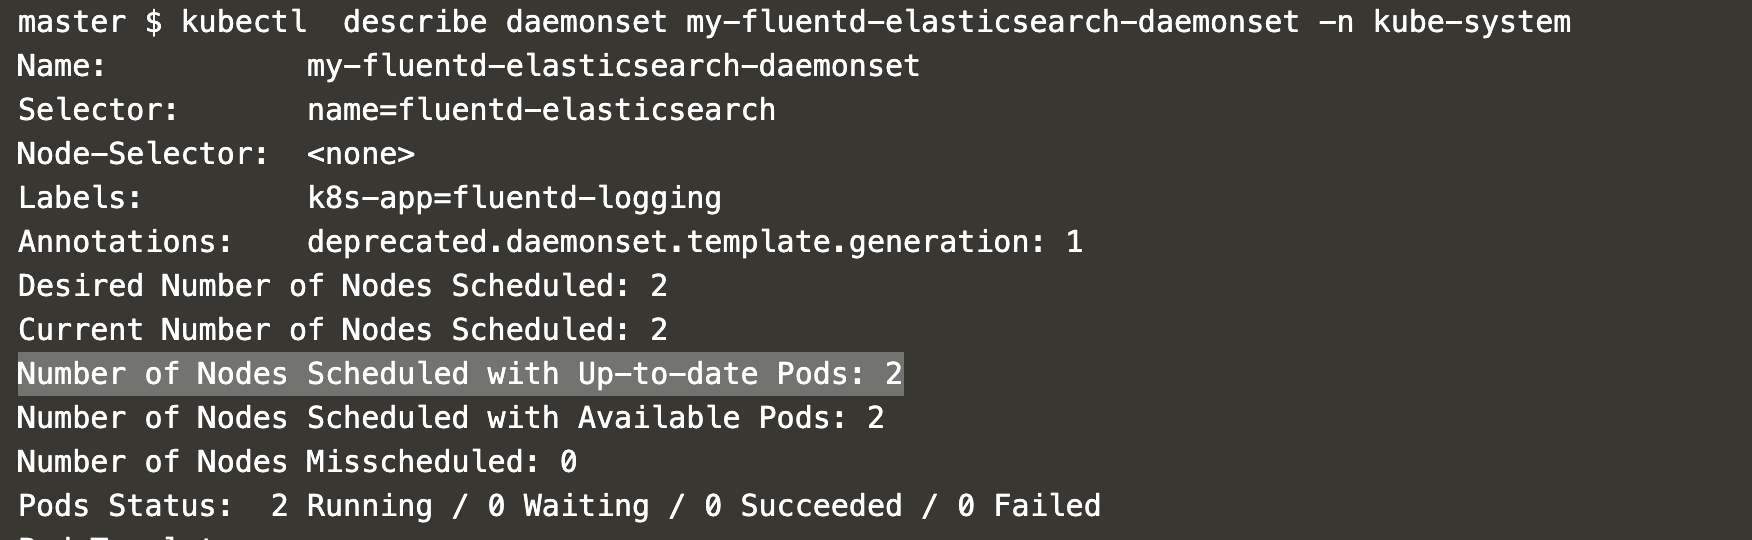
上記のスクリーンショットでは、ポッドが2つのノードにデプロイされていることがわかります。
これで、デーモンセットとして2つのノードにデプロイされたポッドの詳細を取得できます。
kubectl get pods -n kube-system | grep my-fluentd-elasticsearch-daemonset #Get pods from the "kube-system" namespace and grepkubectl describe pod my-fluentd-elasticsearch-daemonset-4t9vs -n kube-system | grep Node #Describe the pods from the "kube-system" namespace and grepkubectl describe pod my-fluentd-elasticsearch-daemonset-kxfjj -n kube-system | grep Node #Describe the pod from the "kube-system" namespace and grep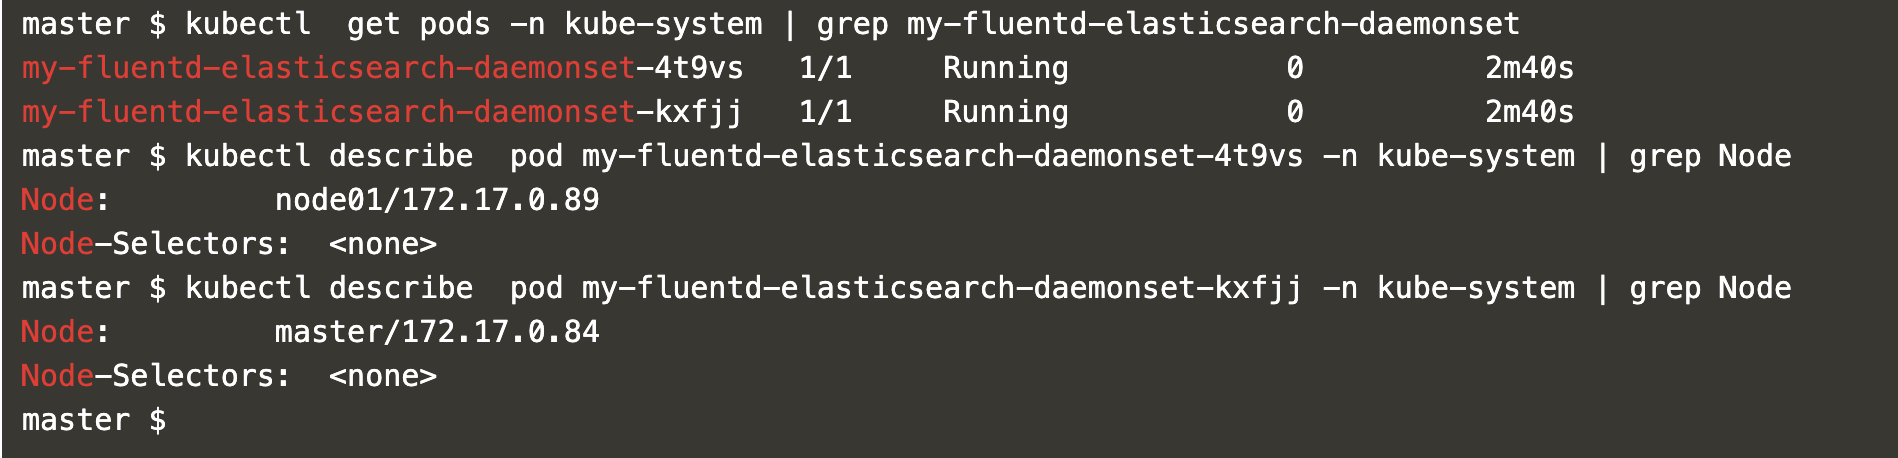
上記のスクリーンショットでは、ワーカーノード「node01」とマスターノード「master」にポッドがデプロイされていることがわかります。マスターノードでスケジュールされたポッドを取得する理由は、マスターノードの汚染に対する耐性です。
結論
この記事では、daemonsetを作成する手順と、daemonsetのポッドがKubernetesクラスターの各ノードにデプロイされる方法を確認しました。